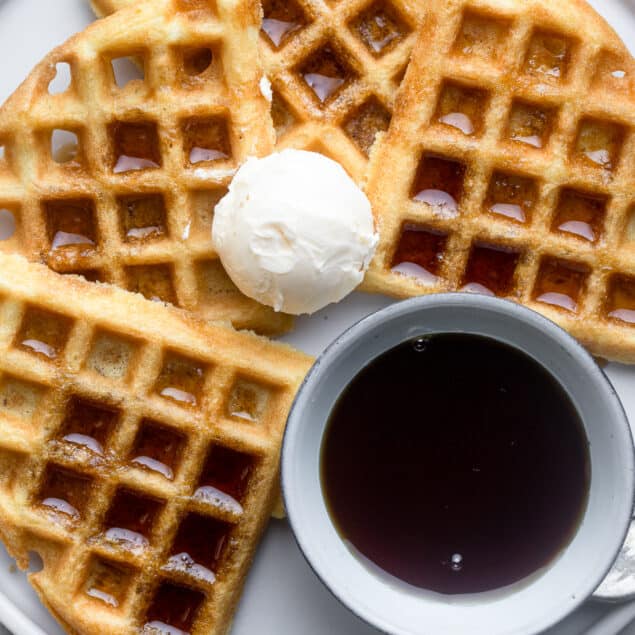
Celiac sufferers, rejoice! Get out that waffle iron and expand that brunch menu—Gluten-Free Waffles are here at last.

Table of Contents
Everyone should know what it’s like to wake up and smell waffles emanating from the kitchen (I am presuming you keep your waffle iron in the kitchen and not, say, in the washroom.). Unfortunately, there are those among us whose bodies are trying to thwart this singular joy. To those I say, “I feel you.”
I also say, “Why not try this recipe!” Thanks to some ingredient tweaking, I’ve produced a version of my traditional waffle recipe that now allows those who cannot tolerate gluten to indulge in everyone’s favorite ironed breakfast dish.
If you’re like me, you will know several Celiac-disease sufferers and others whose tolerance for gluten is negligible. You’ll recognize them as the ones who come over for a group brunch and limit their eating to fruit and yogurt. Well, no more will you associate an upset stomach with my house!
Are Gluten-Free Waffles Healthy?
These waffles aren’t any healthier or worse for you than most other waffle recipes I’ve posted on the site. Their main selling feature is their lack of gluten, which should appeal to a fair number of you. Not only are they gluten-free, they are also vegetarian. Keep in mind the nutritional value of the toppings you’ll no doubt add to your waffles. Just because they aren’t technically an ingredient in your waffles, doesn’t mean their fats and sugars don’t contribute to the bottom line of your meal.
How do I Prevent My Waffles From Sticking To The Iron?
I have some suggestions to mitigate the risk of your waffles not wanting to leave the cozy confines of the iron:
- Preheat the iron and don’t use it until it’s fully heated.
- Use plenty of the nonstick spray, or with a high-heat oil, brush the iron completely.
- What kind of waffle iron do you have? These days you can get a nonstick version, which should help you out big time.
- Don’t open the iron prematurely. They could be sticking because the batter is still liquidy.
- Don’t overfill. We all love waffles but if you don’t limit the amount to the manufacturer’s recommendation, you could be in for a mess.
- Add a bit of fat (e.g., melted butter or oil) to your waffle batter. I’ve found this can help.
- Wait for the steam to subside before opening the iron up.
- If all else fails, use parchment paper to separate the mix from the actual iron. Just make sure the paper doesn’t interfere with the iron’s ability to close.
INGREDIENTS
- 2 cups gluten-free all-purpose flour
- 3 tbsp granulated sugar
- 1 tbsp baking powder
- 1 tsp sea salt
- 1 1/4 to 1 1/2 cups milk or plant-based milk
- 3 tbsp Canola oil or melted coconut oil
- 2 large eggs
- 1 tbsp pure vanilla extract

INSTRUCTIONS
Combine
Combine gluten-free flour, sugar, baking powder, and salt in a bowl.
Whisk
Whisk together milk, oil, eggs, and vanilla extract in a separate container.
Mix
Mix wet and dry ingredients until just combined, adding extra milk if needed for the right consistency.
Cook
Preheat and grease waffle iron, then cook batter until waffles are golden and crisp.
Top
Top waffles with fresh fruit and syrup, then serve immediately.
DEVOUR!

FAQs & Tips
If you’re making waffles for more than just yourself, then I recommend you make some in advance. After all, your iron can only do so many waffles at a time. I typically do up a big batch of the batter then methodically make as many waffles as I have mix for. I’ll store them in my oven on LOW ahead of my guests arriving then pull them out when they arrive. Tip: Don’t stack the waffles; this could make them soggy.
There are several, in fact. Almond flour, tapioca flour, coconut flour, rice flour, corn flour, sorghum flour, buckwheat flour… the list can go on. Which one you choose to use depends on availability (some of these are easier to procure than others), price (the more difficult they are to find, the more expensive they could be), and the natural flavor they bring to your waffle iron. If the thought of waffles with the faint taste of almond or coconut does not make your mouth water, then I doubt almond flour or coconut flour is the option for you.
Let your leftovers cool completely. Storing them while still warm will result in soggy waffles. Put them in an airtight container in the fridge for up to a week. Waffles also freeze really well. You can either wrap them in foil or plastic individually or flash-freeze them (to prevent them from sticking to each other) by laying them out on a baking sheet and putting them in the freezer. After an hour or so, you can put them all in an airtight container. They should last for 3 months.
Try leaving them in the iron a bit longer or turning up the heat ever so slightly. Another way to go is to reduce the amount of milk added by 1/4 cup. Your batter will be drier, which could lead to crispier waffles.
No, you can replace them with applesauce or what we call a “flaxseed egg”. You can make it by mixing ground flaxseed and water.

Serving Suggestions
Before we get into suggestions, the question you need to ask yourself is, Is this meant to be your breakfast or your dessert? If it’s your breakfast and is meant to be a healthy way to start your day, serve your waffles with strawberries, blueberries, raspberries (pretty much any berry). Greek yogurt, nuts (pecans, walnuts, almonds), coconut flakes (especially if you used coconut oil earlier), and honey also make wonderful morning toppings. If you are making these to be a sweet treat then go all in and add whipped cream and/or powdered sugar. You can also add chocolate chips for a boost of chocolate goodness.

Ingredients
- 2 cups gluten-free all-purpose flour
- 3 tbsp granulated sugar
- 1 tbsp baking powder
- 1 tsp sea salt
- 1 1/4 to 1 1/2 cups milk or plant-based milk
- 3 tbsp Canola oil or melted coconut oil
- 2 large eggs
- 1 tbsp pure vanilla extract
Instructions
- In a large mixing bowl, whisk together the gluten-free flour, sugar, baking powder, and sea salt.

- Combine the milk, oil, eggs, and vanilla extract in a separate container, whisking until the mixture is blended.

- Pour the wet ingredients into the dry ingredients and stir until just combined, leaving the batter with a few lumps. Time to adjust the consistency with additional milk if needed.

- Preheat your waffle iron and lightly grease it with oil or non-stick spray. Pour the batter onto the iron and cook according to the manufacturer’s instructions (they need to be golden and crisp!).
- Serve the waffles hot with your choice of toppings.
Nutrition Info:
Recipes written and produced on Food Faith Fitness are for informational purposes only.





Leave a Comment